

You'll want to get a good collection of different cover papers going. Don't ever throw away any wrapping paper. Save the papers you like from any gifts you get, and collect free samples too.
Since this is going to be my Spring/Summer Sketchbook, I've picked out this nice garden-themed wrapping paper, with complimentary string and tissue paper.

Take your covers off and set one of them aside. Use the other as a template to cut the cover paper from your wrapping paper sheet. Give yourself no less than one inch extra around the cover.

Smear some glue all over one side of the cover. Most book-making instructions will tell you to use white glue and an old paintbrush here, but I've found that a glue stick works just as well if not better. Using liquid glue would get us into trouble later anyway.

Flip your cover over and apply glue to the corner paper. Fold it over and secure it with a strip of masking tape as shown. When you've finished the corners, do the same with the sides.

It should look something like this when you're almost finished. Go ahead and repeat all this for the other cover. Then cut your complimentary... we'll call them Fake Endpapers to fit.

This is why we're using a glue stick. This is probably the easiest way to do your fake endpapers if you've for some reason chosen to use a really thin paper for them, like I have.
Set your covers aside to dry for a while. This should take less than an hour and a half, but if you've got an hour and a half, go watch "Sita Sings the Blues". You can watch it for free in, like, twenty different places online and this is all approved by the creator of the movie. Do it. I'm not going to write a big long review, but trust me, the film is absolutely delightful.

Now there comes the tedious part: uncovering the holes we've covered up. Get a sewing needle (and keep it around because we'll need it soon), and use it to find, by touch the holes that attached the cover to the spiral binding. Then take a sheet of paper from your book's "innards" and use it to mark off where to punch the holes. Cover this area with clear packing tape to reinforce it, if you wish.

You don't want to use a normal, sissy-poo hole punch for this. Head to the office supply store of your choice, and invest in a 2-hole punch like the one you see (upside-down) above. Your hands will thank you.

We're almost done, so give your Sketchbook a title! I stick an address label in the inside front cover as well. If you want, you can wrap the covers in clear tape. Do whatever, just make sure you've re-attached the front cover first.

Note how the back cover is attached in the above photo. Thread the needle from earlier and use your string to tie the spiral-binding together to secure it.

Here's the finished Sketchbook, with all the supplies I used to create it!
----
Sketch of the Day!
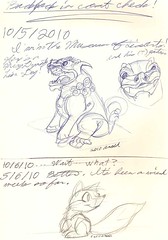
Here's the first thing I drew in my new Sketchbook:
----
By the way, "Heroes" is canceled. And it's a little sad that my reaction to this news was, "Oh. Huh."
Just a head's-up, tonight and Sunday are the last "Lost" episodes ever. I expect to be a bit more torn up about that.
----
There is also a magnificent Frank Frazetta tribute at Something Awful (of all places). Not safe for work, but that should be a given.